Pi-Hole + DoH (DNS over https)
In this guide we’ll install Pi-Hole on Raspberry Pi and use DoH(DNS over https) to encrypt DNS queries.
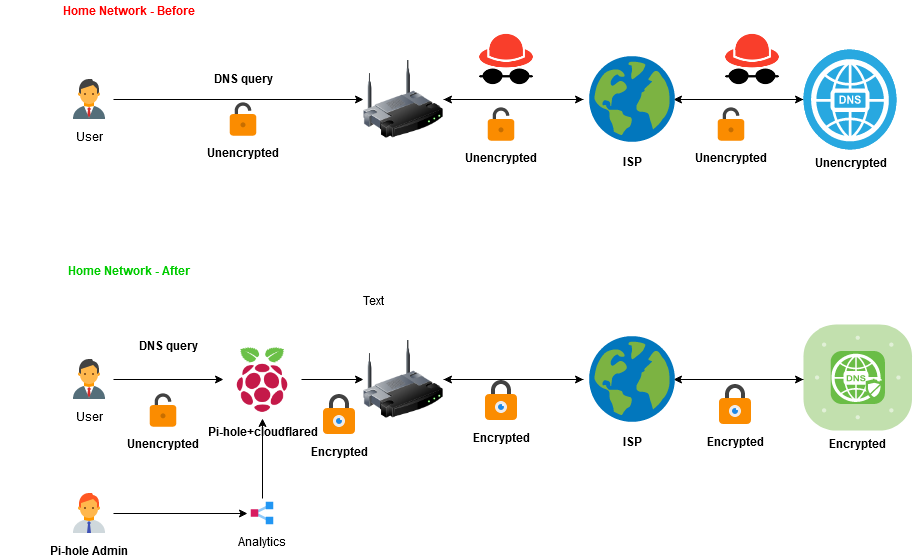
Step 1: Get the Raspberry Pi OS onto microSD card
- Download Raspberry Pi Imager from https://www.raspberrypi.org/downloads/
- Install and launch Raspberry Pi Imager.
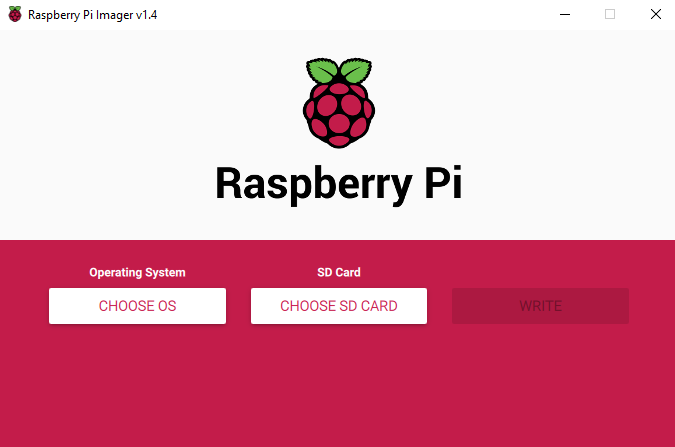
- Click on choose OS and select Raspberry Pi OS 32bit.
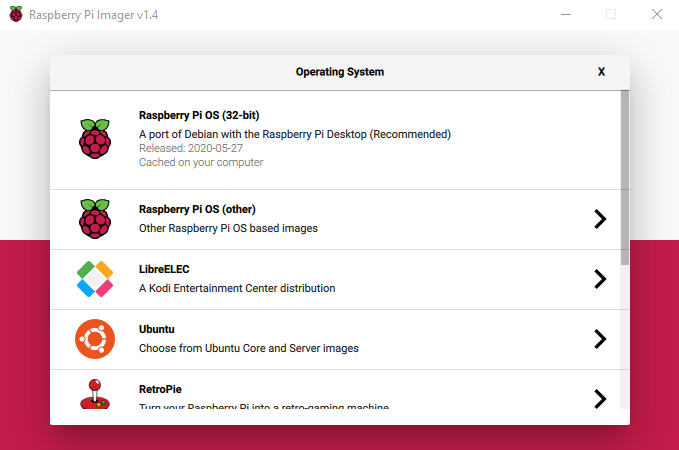
- Select the micro SD card.
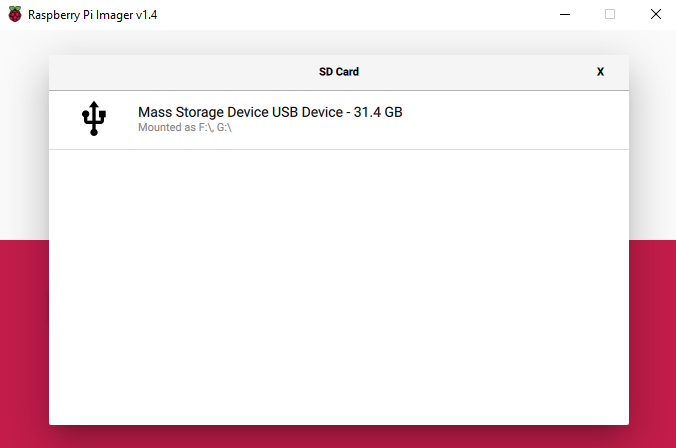
- Make sure you have selected the correct drive, click Yes.
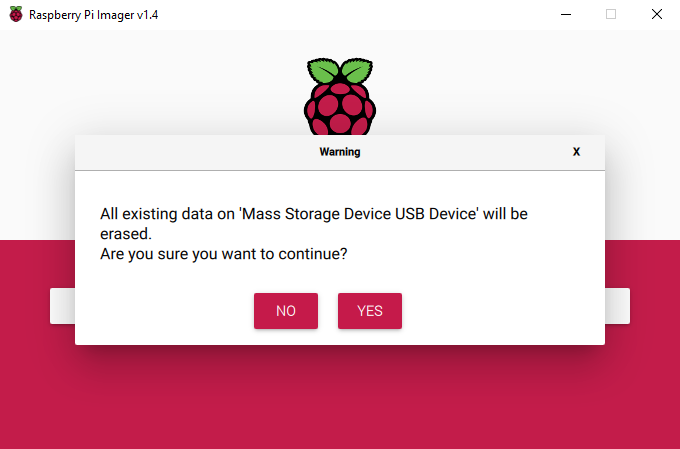
- Confirm and continue.
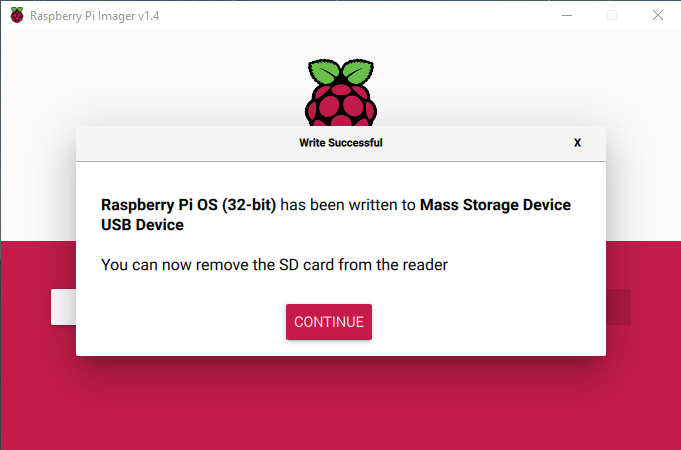
- Once completed disconnect the microSD card and reconnect. create a blank SSH file wihout any extension on the microSD card on main directory. Make sure extension is not .txt,filename should be SSH not ssh.txt.

- Safely remove the microSD card, insert the card into your Raspberry Pi.
Step 2: Connect Raspberry Pi to your Home network
- Connect Ethernet cable and power adapter, there is no ON/OFF switch it will automatically power on.

- Figure out your RPi’s IP address, there are several methods, you can use one of the following and skip others.
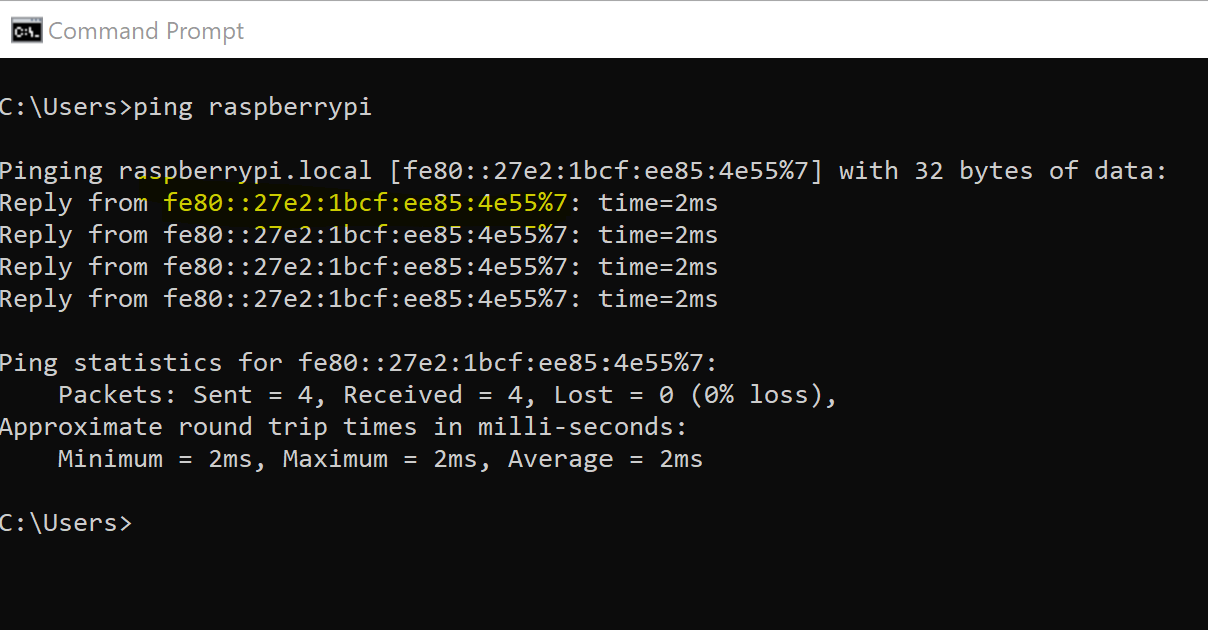
- a. Pinging the default Raspbian hostname. open command prompt or terminal and type ping raspberrypi. You get the IP address. (Picture shows IPv6)
- b. Check your router’s DHCP lease page, you will need login/password for the router.
- c. Connect your Raspberry Pi to TV via HDMI, attached keyboard,use default username:pi and password:raspberry and type ifconfig and enter
- a. Pinging the default Raspbian hostname. open command prompt or terminal and type ping raspberrypi. You get the IP address. (Picture shows IPv6)
- Once you have the IP address
- a. On Windows PC open Putty and enter the IP address and click oepn, also click yes on the next prompt, default username as pi and password raspberry and enter.
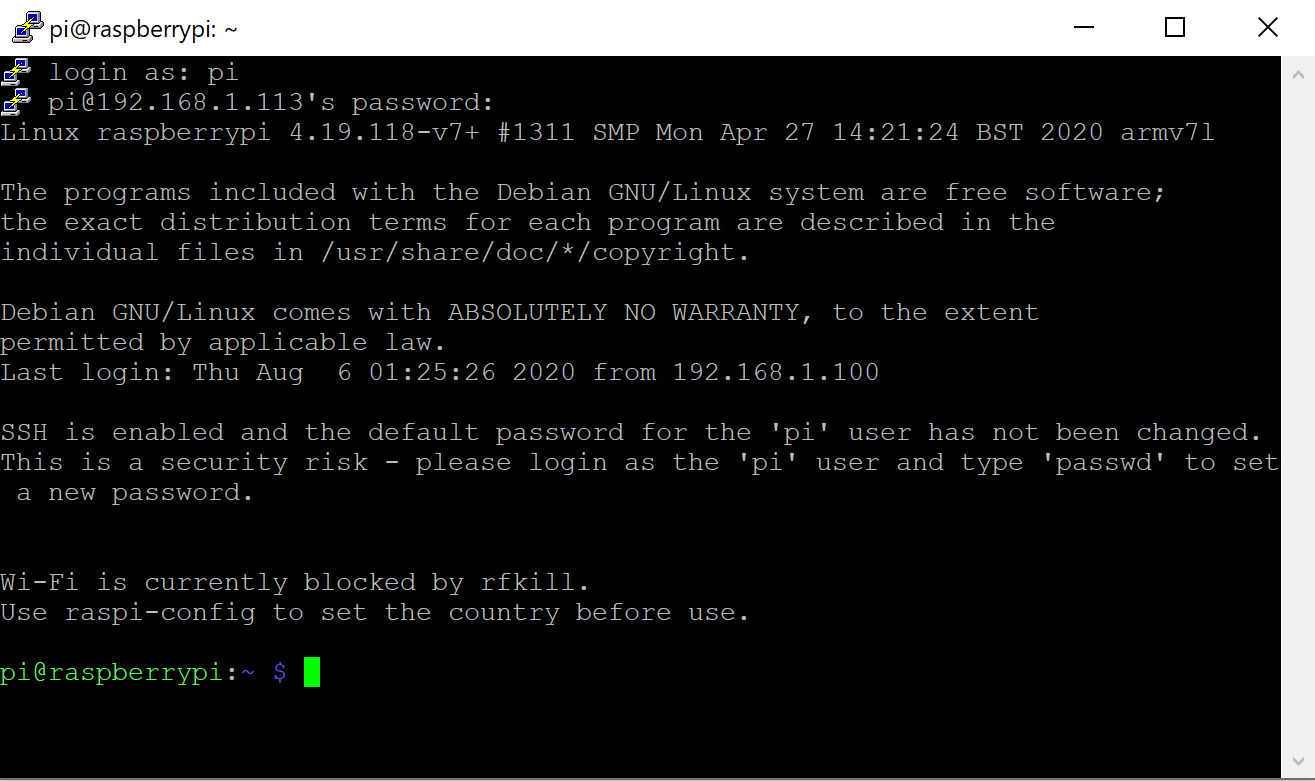
- b. On Mac or Linux pc open terminal and connect ssh connection, replace IP address with your Raspberry Pi’s IP addess.
ssh pi@192.168.1.113
- a. On Windows PC open Putty and enter the IP address and click oepn, also click yes on the next prompt, default username as pi and password raspberry and enter.
- We will do most of our configurations using a handy tool called “raspi-config”.
sudo raspi-config- a. Select 8 and enter, this will update the raspi-config tool.
- b. Select 1 and enter, change the default password.
- c. Seelct 5 Localisation Option -> L2 TimeZone.
- d. Run the following command on terminal
sudo apt update && sudo apt -y full-upgrade && sudo apt -y autoremove && sudo apt -y autoclean && sudo apt install -y rpi-eeprom - e. Assign a static IP address, check free IP via pinging or DHCP lease on the router. for the demo I am assigning 192.168.1.252
sudo nano /etc/dhcpcd.conf - f. Scroll to the end of the file and change the following lines according to your network setup for a static IP.
# Example static IP configuration: interface eth0 static ip_address=192.168.1.252/24 #static ip6_address=fd51:42f8:caae:d92e::ff/64 static routers=192.168.1.1 static domain_name_servers=1.1.1.1 8.8.8.8 - g. Save the changes by pressing ctrl + x keys, then press y and enter. then enter
sudo reboot - h. Open a new SSH connection using new static IP we just assigned.
Step 3: Installing Pi-Hole
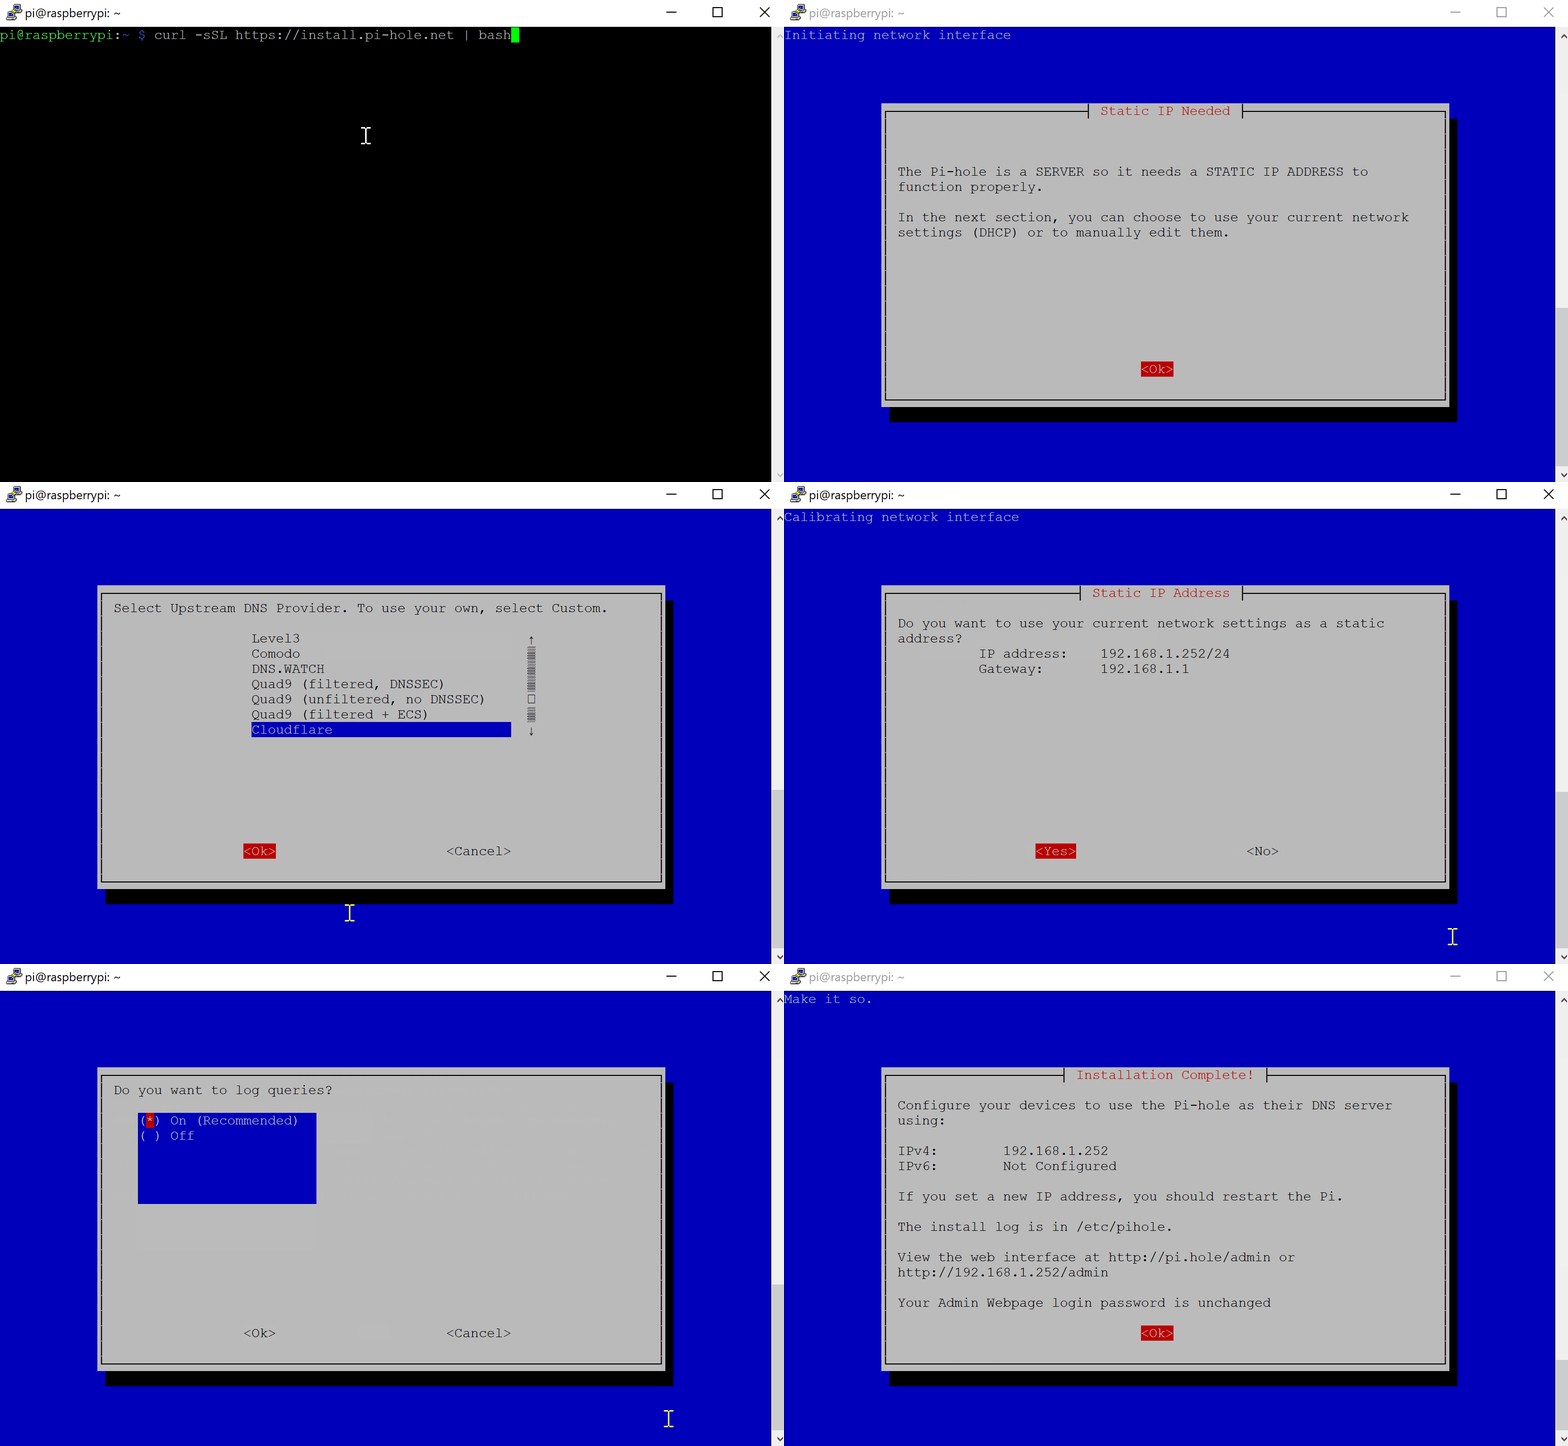
- After the above configurations have been done, it is now time to install the Pi-hole software. The installation process is rather simple. All you have to do is to execute the following command to download the Pi-hole installation script and start the installation procedure.
curl -sSL https://install.pi-hole.net | bash - Follow the prompts to complete setup. However make sure to save the password from last screen. We need this to log into Pi-hole’s web interface.
- Let’s change the Pi-hole’s default password to something that you can remember. Ignore this step if you don’t want to change default password.
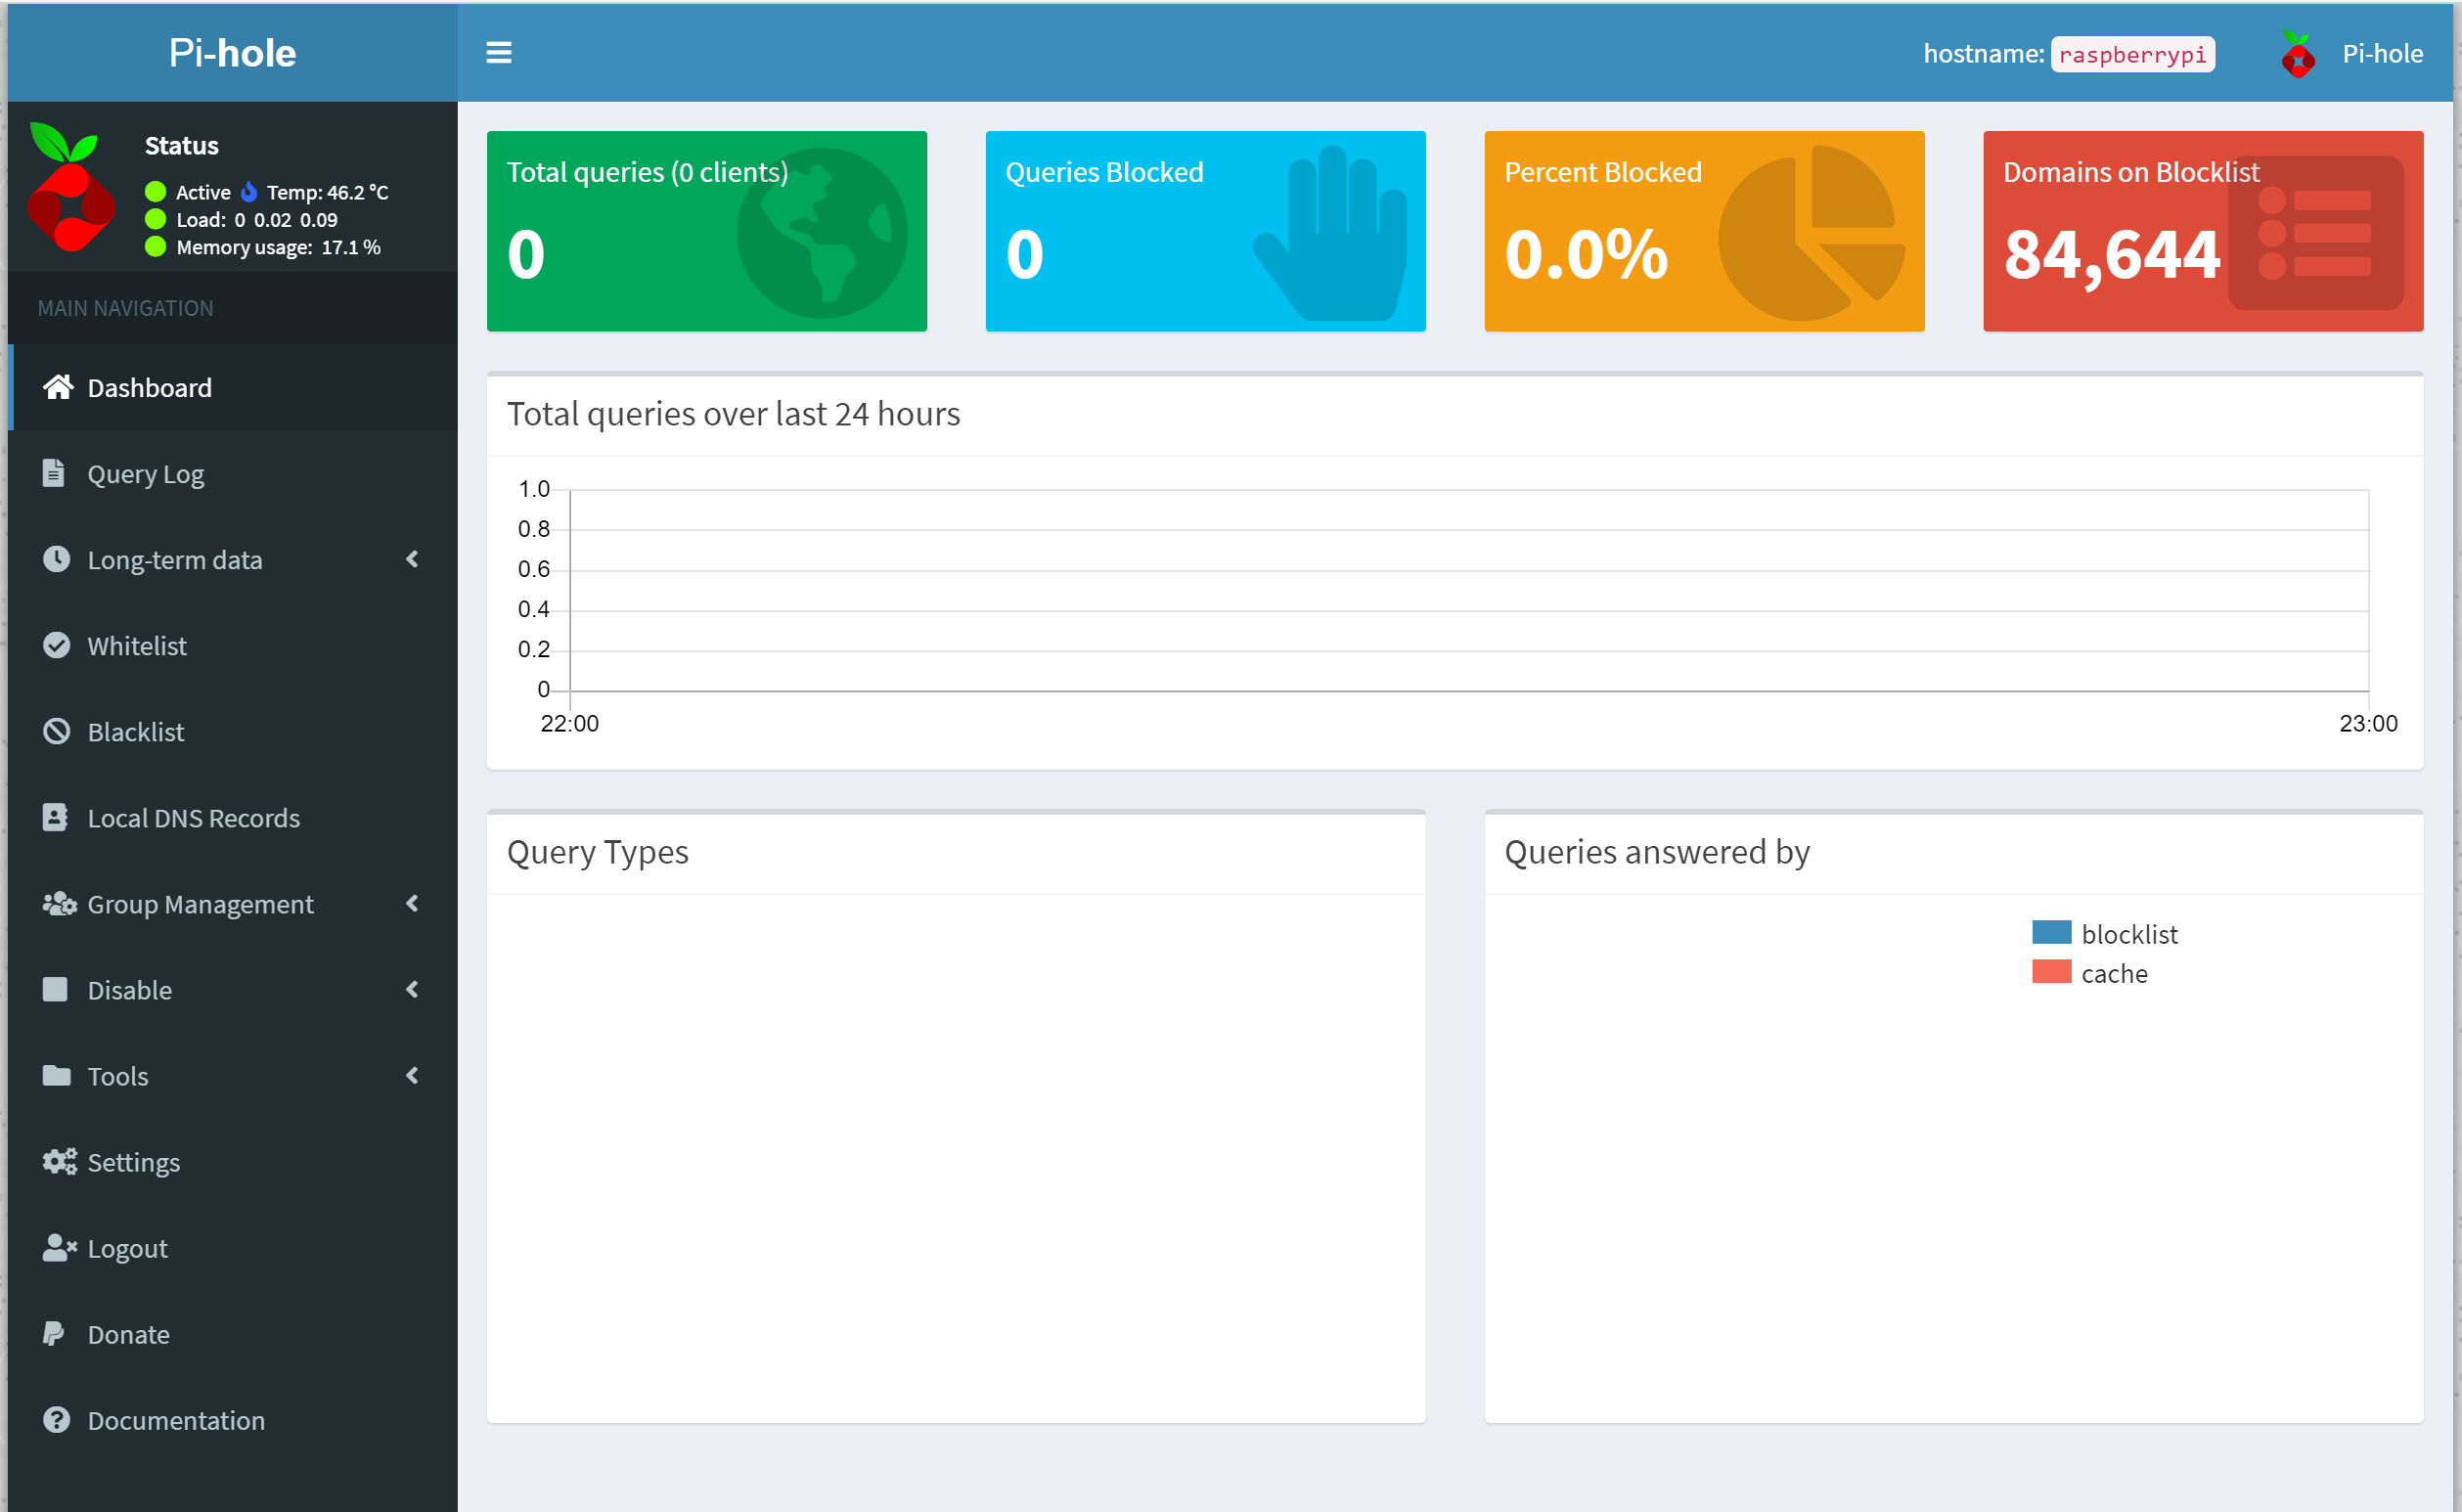
pihole -a -p - Open browser and enter http://IP_ADDRESS/admin/ and enter the password.
Step 4: Installing cloudflared
- To install and configure cloudflared run the following command.
wget https://git.io/JctAF -O install-cloudflared.sh && bash install-cloudflared.sh - Now verify that cloudflared is working! (query a few domains)
dig @127.0.0.1 -p 5053 twitter.com - Configuring Pi-hole
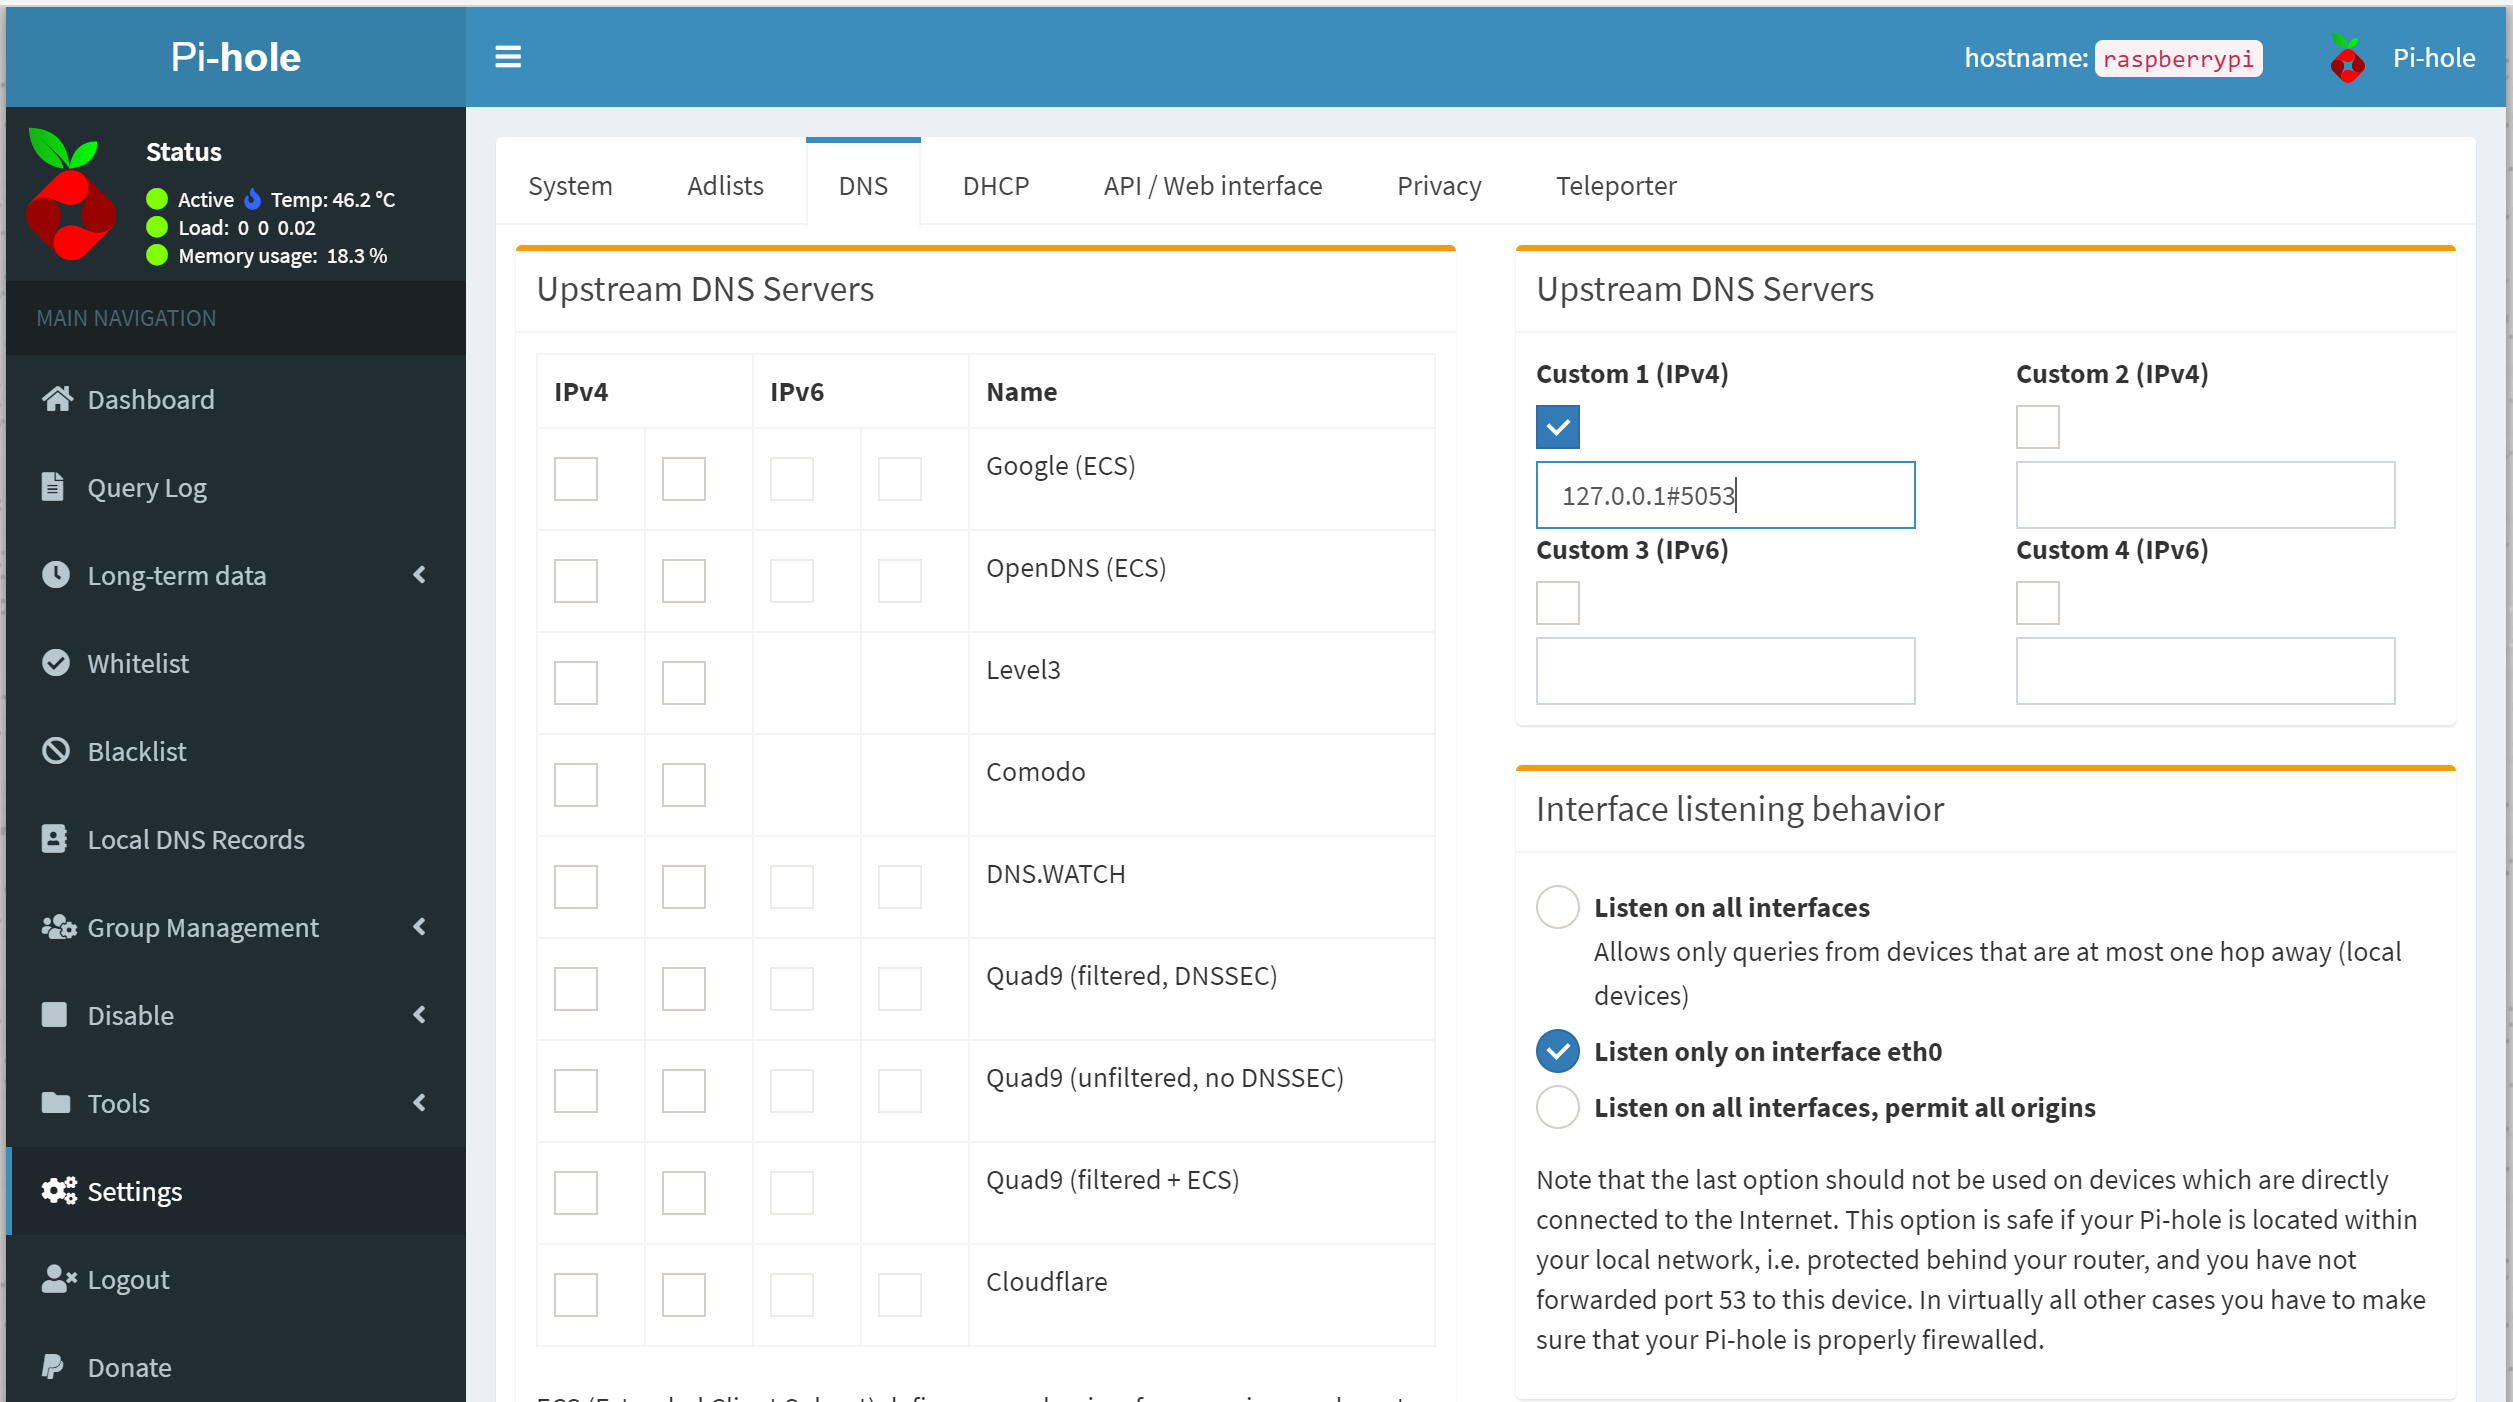
- Finally, configure Pi-hole to use the local cloudflared service as the upstream DNS server (Settings -> DNS) by specifying 127.0.0.1#5053 as the Custom DNS (IPv4).
- Make sure all other Upstream DNS Servers are unchecked and don’t forget to click on Save
Step 5: Setup automatic updates
Now we have everything working, lets setup automatic updates for all the components. (Raspberry Pi OS, Pi-hole, cloudflared and blocklists) Default config will update at 3:00am every day. To setup the automatic updates run the following command.
curl -sSL https://git.io/Jctzj | bash
If you want to change automatic updates schedule please visit this link to learn about cron job.
Step 6: Change DNS on your router
Everyone has different router at home so you will need to consult manual of router to change the DNS server. This link has information on most of the widely routers on how to change the DNS.
If you do not want to change the DNS on the router, you can change the DNS server on devices manually.
Manually Update DNS on iPhone
How to change DNS settings on iPhone, iPad, or iPod touch:
- On your iOS device, open Settings.
- Tap Wi-Fi.
- Tap the i icon next to the Wi-Fi network you want to change DNS servers for.
- Tap DNS.
- Now remove the existing DNS servers and enter the IP address of raspberry PI.
Manually Update DNS on Windows
Please follow this guide and only enter the IP address of raspberry PI.
Manually Update DNS on Mac
Please follow this guide and only enter the IP address of raspberry PI.
Optional: Pi-hole Remote (A Remote app for Pi-hole)
If you are using iPhone you can optionally download Pi-hole Remote to manage Pi-hole from your iPhone. Unfortunately, this app is not available for Android.